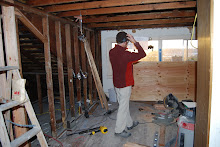
Yesterday Robert and I put in the first round of master bedroom windows. As always, the project got a lot more involved after we got started. When we started to take apart the siding and the roof to make way for the new window framing (the windows are larger and they are moving up around 8" so as to get more blue sky view and less rooftop view and afford us a little more privacy in the bedroom), it was noticed that the roof underneath the dormer was really poorly constructed and needed to be repaired. So we took care of that. We fixed the roof sheathing, put down some new underlayment, repaired the flashing, and relaid the shingles. Fortunately, Robert is an expert at (among many, many other things) fashioning flashing corners. Saved the day.

You can kind of see how uneven the roofing looks underneath dormer. If you look closely, you can also see that there isn't really any flashing between the wall and the roof.

Unfortunately, this all had to get done before we could really start even getting going on the actual window install. Once that was all taken care of, we could move on to removing windows, making new holes for windows, preparing the new holes for windows, and dropping the windows in.
When we removed the old window, we had this giant sized hole left and we had to make some decisions. I accidentally blew out that piece of siding on the left with some exceptionally spirited demo. This is about the time that we noticed just how damaged the siding, flashing, and roof were.
We decided to take off all of the siding, because once we subtracted what we had to remove for the new holes and what was too damaged to reuse, there frankly was not much left. It didn't make much sense to leave a couple of pieces of siding and try to match new material to it. In the long run, it would be far easier to just take it all and redo it. We also took some of the sheathing so that we could replace it with stronger 3/4 " plywood. I think that by this point, the roof had been surgically repaired. We also took out a big header over the window- you've probably already noticed that the hole is higher than where the old window was sitting. Best part: we can reuse the vintage 1920s header over the new windows going into the south bedroom.
The next step was to build a new sill piece for the for the windows. That's an extra 8" of privacy. And it cuts off some of the view of the rooftops to the west.

After tar papering the exterior, we actually got to start installing some windows. In a full day of working (no stopping for lunch because we were on a deadline), I would say that less than an hour was actually spent putting the windows into the walls. Robert would muscle them out the window (they nail in from the outside) and I would push them into place from on the ladder. Of course I was wearing safety ropes and carrabiners and a helmet. You would even have to ask?

All in place! There are four casement windows and they all open up to 90 degrees.

From the inside, the higher up windows not only means a better view, but also more usable wall space underneath them.
Tica offered moral support all day long, only attacking Robert two or three times. Here she is modeling how she will be using the increased amount of sun in the bedroom.


1 comment:
oh, Tica. Sigh.
Post a Comment